Could Microsoft Power Platform help boost innovation in your organisation? At Advania we regularly see how it provides an outlet for individual creativity to add value to our clients’ businesses.
In this blog, the second in a series introducing Power Platform apps, Solutions Architect Steve Worrell discusses how to create a canvas app in Power Apps, taking you from your initial app outline to the tools and best practices you’ll need to ensure success.
Canvas app best practices
App building is an inherently individual and creative process, but we’d recommend following some fundamentals to keep on the right path. Let’s take a look at some of the key things to consider when creating a canvas app.
Plan in advance
Before you even begin to create a canvas app, you should be clear on the business process you’re intending to implement and optimise. You should consider this by breaking down the process into smaller tasks. These tasks can then be achieved via fields in differing sections of either a single or multiple screens as a user passes through said process. It’s also essential to consider what the user journey should look like as they navigate the process within the app.
Once the process is clear we recommend designing the layout of each screen, whether by sketching on a piece of paper or using specialist wireframing software such as Figma. This will help visualise any potential issues and optimise your layout before creation starts, and will act as a reference guide throughout your build.
Know your data model before you create your app
During pre-build it’s important to be aware of where you want to store data or retrieve it from when submitting and/or displaying it within the app.
If you’re submitting new data, unless otherwise directed the best data storage options are SharePoint or Dataverse. With each of these, some form of data model will be required to be set up.
When using SharePoint you can utilise its dedicated connector to submit or retrieve data to a SharePoint list. With this method you have the option of either building the list first and then creating the app utilising the list fields, or creating the app first and then building the SharePoint list.
Use Dataverse if you need a central repository of organisational data. This is exactly what it is designed for, allowing users to submit and retrieve data from several different business applications into one database. Dataverse also provides ability to build a more complex data model with varying relationships between tables (e.g. One-to-One, One-to-Many and Many-to-Many).
In instances where you’re working with pre-existing organisational data, Power Platform provides data gateways (for on-premise systems), a wealth of connectors and the ability to create custom connectors to submit and retrieve data from existing databases and business systems.
Additionally, you can have the best of both worlds where you may need to work with existing data that can’t be modified in its incumbent application and add new process data alongside it. The existing data can be retrieved, displayed and submitted to Dataverse via the canvas app alongside the new data.

Follow app naming conventions
Using naming conventions is a simple but very helpful way of staying on top of navigating and maintaining your separate app features. You’ll be thankful you used them as your app begins to grow with screens, controls, variables, collections and data sources.
There is no one single standard for app naming conventions when creating a canvas app, but best practice states that consistency is key. Therefore, if you begin using camel case for your controls, you should continue with this throughout the app.
Microsoft’s own guidance is that screen names should describe their purpose, use plain language with no abbreviations, include spaces and end with the word ‘screen’. All these steps provide context and, importantly, make sense when read aloud by screen readers.
With control names, Microsoft suggest abbreviating them to three characters, where ‘button’ becomes ‘btn’, with the purpose of said button being appended to the abbreviation, e.g. ‘btnSubmitData’. Following this structure will aid search functionality and building formulas using these controls.
As with screens and controls, it’s recommended that variables and collections are named descriptively of their purpose and, as with controls, are abbreviated to three letters prior to the description, e.g. ‘varRecord’ and ‘colCityPopulations’.
Create a canvas app using powerful tools
Some of the amazing features of canvas apps can go unnoticed if you don’t know about them or where to find them. The following are useful tools I think every canvas app builder should be familiar with.
Employ templates as a starting point for creation
The Power Apps maker portal provides more than 20 pre-built canvas app templates, ranging from Inventory Management to Employee Engagement Surveys. You can use them as a starting base for the app you plan to build or as a template to learn how to utilise canvas app functionality – or you could simply take the parts of the app you like and use them in your own apps.
They’re definitely worth checking out if you want to see the varied ways apps can be implemented.
Use formulas to add power and functionality
Though canvas apps are classed as no-code, their power comes from the built-in formulas available to add to your app to make it interactive.
The amount of functions, signals, enumerations and named operators which fall under the umbrella of formulas are vast, but Microsoft offers documentation covering them in detail.
Formulas allow a multitude of functionality. For example, functions are provided to filter, look up and delegate data retrieved from your data source, which is incredibly helpful and allows for performance optimisation.
Furthermore, formulas can allow you to interact with all control properties, allowing you to change icon colours on a click, display a validation message to the user, or even submit data to the data source. In addition to this, canvas apps provide various operators such as arithmetic, comparisons and concatenation to name just a few.
Quite possibly the best thing about formulas is that they use Power Fx, which is exactly the same formula language, functions and operations used in Excel. If you’re familiar with Excel you’ll find the transition to using formulas in Power Platform seamless. The only difference is that instead of your formulas working on cells, they work on objects and control properties.
Include components for additional control
Canvas apps allow for the building of components within an app. Components are essentially custom controls which provide numerous advantages. One such benefit is that components are re-usable, not only within the app in which they are created but across multiple apps when they’re added to a component library.
Components are extremely useful when you want to utilise the same control, such as navigation, across multiple screens without copy and pasting each time. Additionally, when a component is changed within a canvas app, that amendment is reflected across all instances of the component within that app.
Where components and the components library really come into their own is when using similar custom functionality across multiple apps, as they provide you with the ability to import the component to other canvas apps and utilise them straight away.
Manage your app via search
With any canvas app you’ll find that your controls, objects and components grow as you add more functionality.
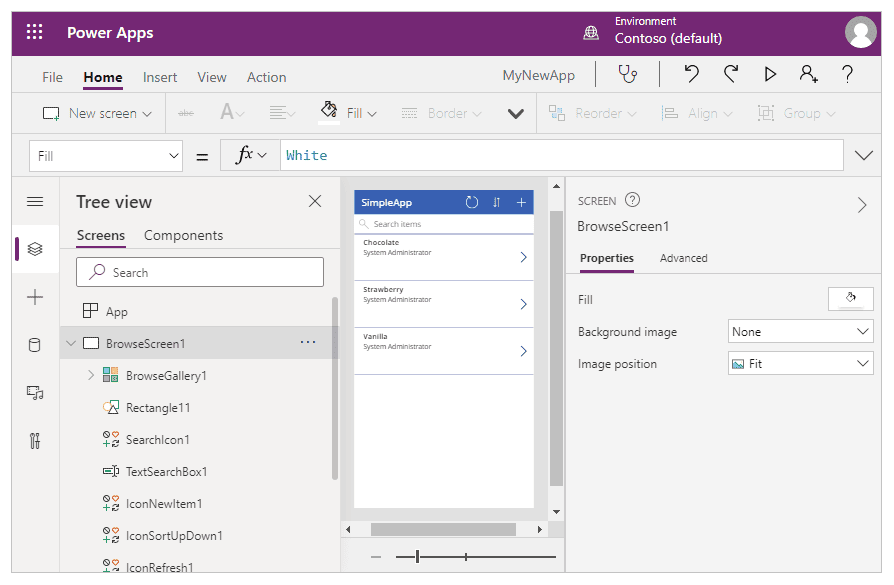
This is where utilising the search tool is worth its weight in gold. The search pane within the maker portal allows you to find, go to and replace your app elements quickly and efficiently, as it includes screens, variables, collections, media, components, data sources and even flows in its search capability.
In addition, there are really useful search options available, from matching case or whole word to regular expressions.
Combining search and naming conventions should make managing your app features a painless and more straightforward task.
Canvas app best practices: test and test again
Whether you create a canvas app as part of a business project or just a side hobby, it’s imperative to test throughout the build and heed any warnings or errors from the in-built App Checker functionality.
As you add new controls and formulas to your app, functional testing is encouraged to ensure your new functionality does what you expect it to do. The Preview button in the editing screen opens the app in its current state giving you immediate testing capability.
In App Checker, a red dot will appear if an an error is detected – such as with a formula – but will not appear where there are potential accessibility issues. Therefore, before publishing your app, you should ensure the app meets all necessary accessibility standards.
Collaborate and integrate
It’s always useful to have another pair of eyes review the app once you’ve begun implementation. You may even have colleagues you wish to co-author the app with.
Once your app is ready for launch, you can share it with your entire organisation and guest users provided they all have the relevant licensing.
Completing the app isn’t necessarily the end of the journey either, as you may wish to consider the other parts of Microsoft 365 it could be integrated with. For example, your app may be useful to utilise and access via Teams. If so, it’s possible to add it via the apps settings. Moreover, canvas apps can be embedded in SharePoint and model-driven apps.
With this widespread ability to share and integrate, you have every opportunity to ensure that all required users are able to reach and utilise your app.

Stuck? Found a bug? Want more canvas app best practices? Use the community
Depending on who you ask, you might get a completely different list of canvas app best practices than the ones I’ve listed here, which is exactly why you should utilise the plethora of brilliant content and tutorials available from Microsoft and the growing Power Platform community.
There’s an incredibly talented, knowledgeable and super-enthusiastic community that has been born out of the genesis of the Power Platform. That’s just as well, as Microsoft continues to improve and add to this suite of products. App builders will be continually looking to keep on top of the latest releases to improve and evolve their apps and share that experience with others.
The Power Platform community has many skilled contributors but we don’t think you can go wrong when looking for tutorials on how to create a canvas app (aside from contacting us at Advania) than viewing the YouTube channels of Microsoft MVPs Shane Young, April Dunnam and Reza Dorrani.
Your next steps to create a canvas app
In this article I’ve highlighted some of the high-level best practices and considerations when building canvas apps, but there’s so much that could still be delved in to. If you found this article of interest and would like to know more about canvas app specifics, please let us know.


